
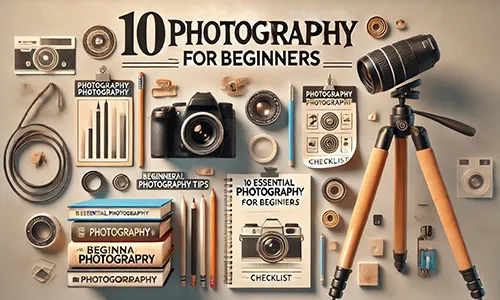
Photography is an art form that allows us to capture the beauty of the world around us, preserving memories and emotions. However, for beginners, it can be overwhelming to know where to start. Whether you’re picking up a camera for the first time or trying to improve your skills, these 10 essential photography tips for beginners will help you get the most out of your camera and take stunning photos.
1. Understand the Basics of Exposure
Exposure is the key to a good photo. If a photo is too bright or too dark, the exposure is off. A good understanding of exposure can elevate your work from simple snapshots to artistic compositions.
-
Aperture: Aperture controls how much light enters the lens. It also affects the depth of field, which is the amount of your image that’s in focus. A wide aperture (like f/1.8) will blur the background, making your subject pop. A small aperture (like f/16) keeps more of the scene in focus, which is great for landscapes.
-
Shutter Speed: Shutter speed determines how long the camera’s sensor is exposed to light. A fast shutter speed (like 1/1000) will freeze motion, while a slow shutter speed (like 1/30) can create motion blur — great for capturing moving subjects like waterfalls or cars.
-
ISO: ISO controls the sensitivity of your camera’s sensor to light. A higher ISO (like 1600 or 3200) is useful in low-light situations but can introduce noise (grain). A lower ISO (like 100 or 200) gives you clean, sharp images but requires more light.
2. Master the Rule of Thirds
Composition is one of the most important aspects of photography. The rule of thirds is a foundational technique that can transform your images. Imagine dividing your frame into a 3×3 grid. Place your main subject along these lines or at the intersections of the grid. This creates balance and allows for a more engaging composition.
While the rule of thirds is a great guideline, don’t be afraid to break it. Sometimes a centered composition or unique framing might work better for your particular shot.
3. Learn to Use Natural Light
Lighting is everything in photography. One of the best sources of light for beginners is natural light. It’s free, and it’s often softer and more flattering than artificial light.
-
Golden Hour: The first hour after sunrise and the last hour before sunset are referred to as the “golden hour” because of the soft, warm light that makes everything look magical. It’s perfect for portraits and landscapes.
-
Avoid Harsh Midday Sun: The midday sun can create harsh shadows and overexposed highlights. If you have to shoot during midday, look for shaded areas or use a reflector to soften the light on your subject.
4. Focus on Composition
Composition is how you arrange elements in your frame. While the rule of thirds is one of the easiest ways to achieve great composition, there are other techniques to keep in mind:
- Leading Lines: Use roads, rivers, fences, or any other lines in your environment to lead the viewer’s eyes to the subject.
- Framing: Use natural elements (like branches or windows) to frame your subject. This adds depth and draws attention to the focal point.
- Symmetry and Patterns: Look for symmetrical scenes or repeating patterns. These compositions often create visually striking and satisfying images.
5. Shoot in Manual Mode
When you start with automatic settings, it’s easy to get used to letting the camera do the thinking for you. However, if you want full creative control over your photos, try shooting in manual mode. It might seem complicated at first, but with practice, it becomes second nature.
In manual mode, you control aperture, shutter speed, and ISO, giving you the flexibility to capture the image exactly how you want it. Begin by adjusting one setting at a time and observe how the changes affect the exposure.
6. Invest in a Good Lens
While the camera body gets a lot of attention, the lens is arguably the most important part of your camera setup. A quality lens will significantly impact the sharpness, clarity, and overall aesthetic of your photos.
-
For beginners, a 50mm f/1.8 lens is a great starting point. It’s affordable, sharp, and has a wide aperture for beautiful blurred backgrounds (bokeh).
-
A 24-70mm zoom lens is also a versatile option, offering a variety of focal lengths for different types of photography, from portraits to landscapes.
7. Keep Your Camera Steady
One of the biggest challenges in photography is avoiding camera shake, which leads to blurry photos. If you’re shooting in low light or using a slow shutter speed, a tripod can be a lifesaver.
If you don’t have a tripod, you can stabilize your camera by holding it with both hands and keeping your elbows close to your body. Leaning against a wall or resting your camera on a solid surface can also reduce camera shake.
8. Experiment with Depth of Field
Depth of field refers to how much of the scene is in focus. A shallow depth of field (achieved by using a wide aperture like f/1.8) makes your subject stand out against a blurred background, perfect for portraits or close-ups. On the other hand, a deeper depth of field (using a small aperture like f/16) is ideal for landscapes, where you want everything to be in sharp focus.
Experiment with different apertures to see how depth of field affects your photos and how you can use it to enhance your compositions.
9. Pay Attention to White Balance
Sometimes, photos can look too warm (yellow) or too cool (blue), especially when shooting in artificial light. White balance helps you ensure that the colors in your image look natural. Most cameras have an automatic white balance setting, but you can manually adjust it for specific lighting conditions. For example:
- Daylight setting is great for sunny days.
- Cloudy can warm up the image for overcast days.
- Tungsten is useful for shooting indoors under incandescent light.
Taking the time to adjust your white balance settings can help ensure your photos look their best, no matter the lighting.
10. Practice, Practice, Practice
Becoming a great photographer takes time and effort. The more you practice, the better you’ll become at understanding your camera and refining your skills. Don’t be afraid to experiment with different techniques, styles, and subjects. And remember, mistakes are part of the learning process!
- Set yourself small challenges: Try taking portraits, street photography, or nature shots.
- Join photography communities or online forums where you can share your work and get feedback from others.
Bonus Tip: Post-Processing is Key
While capturing a great photo is important, post-processing can take your images to the next level. Software like Adobe Lightroom or Photoshop allows you to fine-tune exposure, color, and composition. However, don’t rely too heavily on post-processing — aim to get as much right in-camera as possible.
Conclusion
Photography is an exciting and rewarding skill to develop. By following these 10 essential photography tips for beginners, you’ll be well on your way to taking photos that you’ll be proud of. Remember, learning photography is a journey. Be patient with yourself, and most importantly, have fun experimenting with your camera. The more you practice, the better your photos will become, and the more you’ll enjoy capturing the world around you.
FAQ
This FAQ answers common questions about starting your photography journey. It covers camera choices, basic settings, composition tips, and shooting techniques to help beginner photographers build a strong foundation and improve their skills.
What camera should I start with as a beginner?
As a beginner, it’s best to start with a DSLR or mirrorless camera that offers manual control settings and a good selection of lenses. Popular beginner-friendly models include the Canon EOS Rebel series, Nikon D3500, and Sony Alpha a6000. If you prefer something more compact, a point-and-shoot camera or a smartphone with manual controls can also work well.
What settings should I use for a good photograph?
The three most important camera settings to understand are:
-
Shutter Speed: Controls how long the camera sensor is exposed to light. Faster shutter speeds (such as 1/500s) freeze motion, while slower speeds (such as 1/30s) create motion blur.
-
Aperture: Determines how much light enters the lens and affects depth of field. A wider aperture (smaller f-number like f/2.8) creates a blurred background, while a smaller aperture (larger f-number like f/16) keeps more of the scene in focus.
-
ISO: Controls the camera’s sensitivity to light. Higher ISO helps in low-light situations but can introduce noise or grain into the image.
How can I avoid blurry photos?
Blurry photos are usually caused by camera shake or incorrect focus. To avoid this:
-
Use a faster shutter speed to freeze motion, especially for moving subjects.
-
Make sure your subject is properly focused using autofocus or manual focus, particularly in low light.
-
Stabilize your camera by using a tripod or holding it with both hands while keeping your elbows tucked in.
What is the best way to learn composition?
Good composition makes photos more visually appealing. Helpful techniques for beginners include:
-
Rule of Thirds: Divide the frame into a 3×3 grid and place your subject along the lines or intersections.
-
Leading Lines: Use natural lines like roads, fences, or rivers to guide the viewer’s eye.
-
Framing: Use elements such as windows, doorways, or trees to frame your subject.
-
Fill the Frame: Move closer to your subject to reduce background distractions and increase impact.
Experimenting with different compositions over time will help you develop your own photographic style.
Sports Photography Tips: How to Capture Action Shots Like a Pro
Mastering Sports Photography: Tips, Techniques, and Gear for Capturing Action
Sports photography is a thrilling and fast-paced genre that requires a unique set of skills to capture the perfect moments. Whether you’re photographing a local game or a professional match, it can be challenging to freeze fast-moving athletes while maintaining sharp focus. Here are some essential tips to help you take incredible sports photos.
1. Use a Fast Shutter Speed
In sports photography, action is everything. To freeze motion and avoid blurry images, you’ll need a fast shutter speed. Typically, a shutter speed of 1/1000th of a second or faster is ideal for high-speed action like running, cycling, or fast ball movements. If you’re photographing slower actions (like a player setting up a shot), you can use a slightly slower shutter speed, but always ensure it’s fast enough to freeze the key action.
2. Increase Your ISO
Low light is common in sports photography, especially when you’re shooting indoors or at night. Increasing your ISO allows your camera’s sensor to be more sensitive to light, helping you capture well-exposed images in challenging lighting conditions. However, be mindful of introducing noise into your images. Ideally, try to keep your ISO as low as possible (e.g., 800 to 1600) while still maintaining a fast shutter speed.
3. Use Continuous Autofocus
Sports photography often involves subjects that are constantly moving, so it’s essential to use continuous autofocus (AI Servo or AF-C mode). This setting helps your camera track a moving subject and adjust focus in real-time, ensuring sharp focus even during fast movements. This is crucial for action-packed scenes where subjects are in constant motion.
4. Shoot in Burst Mode
One of the best ways to capture the perfect sports shot is by using your camera’s burst mode (also known as continuous shooting mode). By holding down the shutter button, your camera will take a series of photos in rapid succession. This allows you to choose the best moment from a sequence of shots, ensuring you don’t miss that perfect action shot.
5. Consider Your Composition
Good composition is just as important in sports photography as in any other genre. While capturing the action is important, you also want to create images that are visually dynamic.
- Framing: Always anticipate the action and frame your shots accordingly. Don’t just focus on the athletes—include the background to tell a fuller story.
- Movement: Sometimes, motion blur can enhance the feeling of speed and excitement in sports photos. For example, panning with the athlete as they run or cycle will create a blurred background, making the subject appear sharp and in motion.
6. Get Close to the Action
To make your sports photos more impactful, try to get close to the action. Being near the athletes gives your photos an intimacy and drama that you can’t capture from a distance. This is especially effective for portrait-style shots or when focusing on individual athletes in key moments.
- Telephoto Lens: A long lens (such as a 70-200mm) is ideal for sports photography, as it allows you to shoot from a distance without sacrificing image quality. It also helps you isolate your subject from the background, creating a more professional, clean look.
7. Anticipate the Moment
One of the most important skills in sports photography is the ability to anticipate the action. Pay attention to the flow of the game, the players’ movements, and their body language. By understanding what’s likely to happen next, you can position yourself in the best spot and be ready to capture the decisive moment.
- For example, if you’re photographing a soccer match, anticipate when a player is about to shoot the ball at the goal. In basketball, watch for key moments like slam dunks or fast breaks.
8. Use the Right Lens for the Job
Choosing the right lens can make a significant difference in your sports photography. A fast, long lens is often preferred, as it allows you to zoom in on distant subjects while capturing them in sharp focus. Here are some great options:
- 70-200mm f/2.8 lens: Perfect for zooming in on fast-moving athletes without compromising image quality.
- 400mm f/2.8 lens: Ideal for shooting from a distance, especially for outdoor sports like football or baseball.
9. Be Prepared for Post-Processing
Sports photography often requires a bit of post-processing to perfect the images. You may need to adjust the exposure, contrast, and sharpness of your photos. For example, if you shot in a lower light situation, you might want to increase the exposure or use noise reduction techniques.
Also, consider cropping your photos to improve composition or remove distractions from the background. But remember: keep post-processing to a minimum to maintain the natural energy of the action.
10. Respect the Athletes and Spectators
Sports photography is all about capturing the action, but it’s also important to be respectful of the athletes, coaches, and spectators around you. Stay aware of your surroundings and be mindful not to obstruct the view of others. Always be considerate when using flash, as it can distract athletes and disrupt the flow of the game.
Conclusion: Mastering Sports Photography
Sports photography is an exciting field, but it takes practice, patience, and knowledge to master. By following these tips, you can begin capturing fast-paced moments with greater ease and precision. The key to becoming a great sports photographer is anticipation, timing, and understanding the fundamentals of photography — combined with the thrill of the game.
You Can Read More
Pay Attention to the Background
A clean background is essential in sports photography. However, a cluttered background can distract from the action and make the subject less impactful. To avoid this, look for areas with simple, unobtrusive backgrounds, like a plain wall or a blurred-out crowd. Additionally, you can adjust your depth of field by choosing a wider aperture (e.g., f/2.8) to blur the background and emphasize the subject.
If the background is too busy or distracting, try to reposition yourself for a clearer shot. For instance, changing angles or moving closer to the action can help create a more visually appealing composition.
Capture the Emotions and Reactions
While action shots are key in sports photography, it’s equally important to capture the emotions of the athletes. The moments after a big play, the celebration, or the tension during a critical game can make for incredibly powerful photos. Therefore, make sure to capture the expressions, body language, and interactions between players.
In particular, look for the raw, unscripted moments that show the passion and intensity of the sport. After all, these emotional shots often resonate more with viewers than just action alone.
Use Panning for Dynamic Shots
Panning is a technique where you follow a moving subject with your camera while using a slower shutter speed. As a result, the background blurs while the subject remains sharp, adding a sense of speed and action to your photos.
To get it right, follow these steps:
- Set a shutter speed between 1/250th and 1/500th of a second (depending on the speed of the subject).
- Focus on the subject and move your camera with it as it passes by.
- Most importantly, keep the subject in focus while allowing the background to blur.
This technique works particularly well for fast-moving sports like cycling, car racing, or track events.
Use Burst Mode Strategically
Burst mode allows you to take a rapid series of photos with one press of the shutter button. In fast-paced sports, this feature is invaluable because it helps you capture that perfect moment, whether it’s a player making a goal or a slam dunk in basketball.
To make the most of burst mode:
- Hold the shutter down for a few seconds, allowing the camera to capture multiple frames.
- Afterward, review the shots carefully to pick the best one.
- However, be mindful of your camera’s buffer capacity, as continuous shooting can fill up your memory card quickly.
FAQ
Find answers to common questions about sports photography, including camera settings, lens recommendations, capturing motion, and shooting in low-light conditions. Whether you’re a beginner or looking to improve your skills, this FAQ will help you get more out of your sports photography sessions.
What camera settings should I use for sports photography?
Sports photography requires fast settings to freeze action and maintain sharpness. Key settings include:
-
Shutter Speed: Use at least 1/1000th of a second for fast action. Adjust based on the speed of the sport.
-
Aperture: Set a wide aperture (around f/2.8–f/5.6) to allow more light and create a shallow depth of field.
-
ISO: Adjust ISO based on lighting conditions. In bright light, ISO 400–800 works well. In low light, ISO 1600 or higher may be needed.
-
Autofocus: Use continuous autofocus (AI Servo or AF-C mode) to track moving athletes.
Do I need a telephoto lens for sports photography?
Yes. A telephoto lens such as a 70–200mm f/2.8 or 400mm f/2.8 is highly recommended. It allows you to zoom in on athletes from a distance, capture sharp images, isolate subjects from the background, and emphasize action.
How can I capture motion without blurring my subject?
To avoid motion blur, use a fast shutter speed—typically 1/1000th of a second or faster for fast-moving sports. If you want creative motion blur (such as a moving cyclist or ball), try slower shutter speeds like 1/250th, keeping in mind that this may blur the athlete as well.
What type of lens should I use for indoor sports?
Indoor sports usually have limited lighting, so a lens with a wide aperture is important. A 50mm f/1.8 is a good affordable option, while a 70–200mm f/2.8 zoom lens offers more flexibility for capturing both close and distant action.